
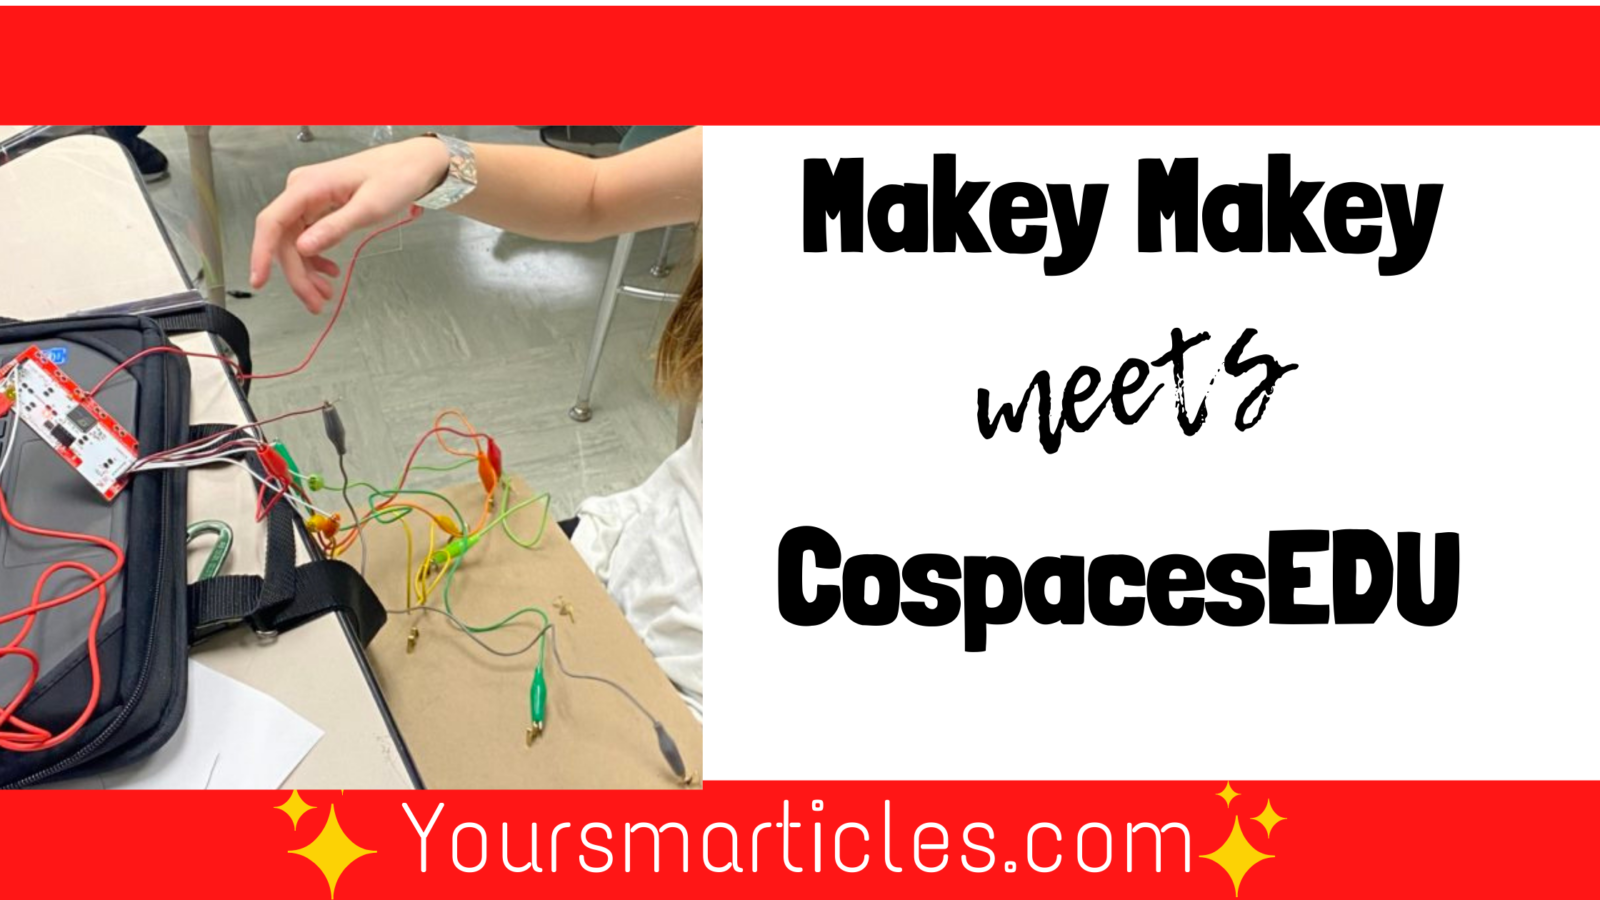
When virtual reality meets ELA class you get a BUNCH of engaged and excited students! That’s what happened for us these past few weeks as we explored Plot Structure using CoSpacesEDU and Makey Makeys.
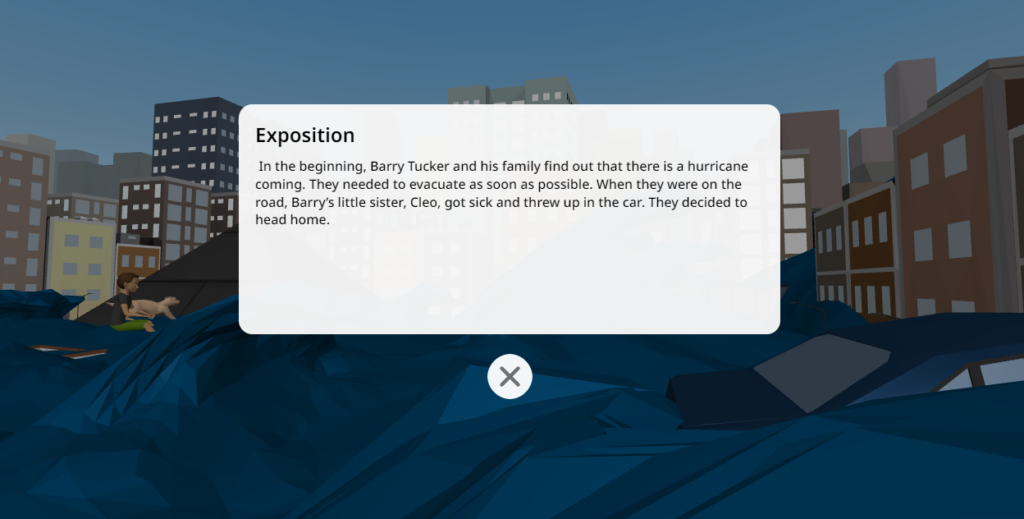
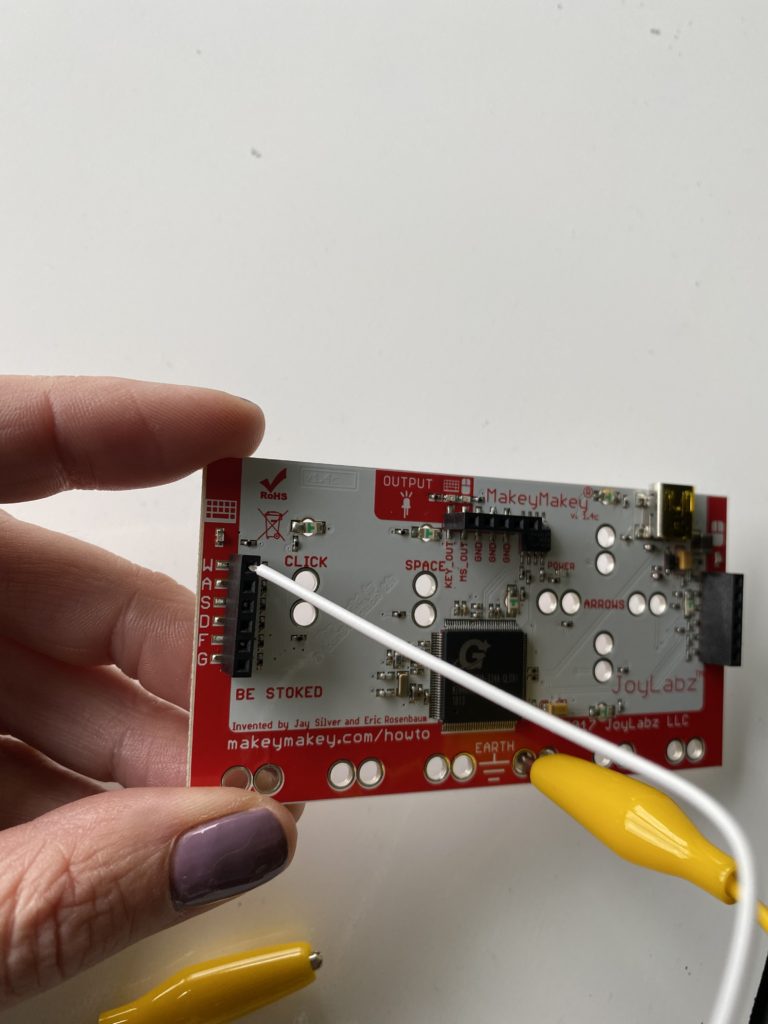
To get a visual picture of exactly what we did, imagine a virtual world designed by students in CoSpacesEDU. CoSpacesEDU is an awesome 3D creation tool that allows students to design virtual reality environments. The students designed virtual world showing a scene from a novel that they’ve recently read. In the virtual world, information panels were coded to pop up on the screen when certain keystrokes were made. In the case of our project, the panels explained either Exposition, Rising Action (1,2,3) Climax, Falling Action or Resolution. These key strokes were controlled by a cardboard control panel that allowed the user to ‘touch’ a brass fastener serving as a button. Connecting the PC to the Control Panel was a Makey Makey device communicating to the PC which keystroke is represented by the push of the brass buttons on the control panel.
How We Did It
Step #1: Drafting the Plot Elements
The project started with a novel. Students used a graphic organizing sheet to brainstorm seven components of their novel (Exposition, Rising Action #1, Rising Action #2, Rising Action #3, Falling Action and Climax) and write descriptions of each component.
Step #2: Designing the Scene(s)
Students then began creating their scenes in CoSpacesEDU. Needless to say, this is where we saw an EXPLOSION of creativity! Students added historic castle scenes, school classroom settings, black and white historic cities, cat-filled fantasy worlds, water worlds with waves and boats or depicted young boys riding their bikes through the wilderness. They added animated dragons, giant flying ravens and beloved fictional characters with their well-known pets. A LOT of creative space was given for students to generate their scenes before diving into the coding aspect of the project.
Step #3: Coding the “Pop Up” Elements
For the code, students were introduced to this general coding block sequence:

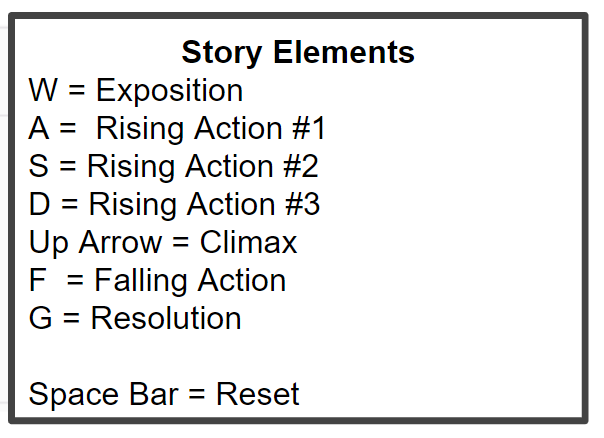
This coding sequence is essentially what allowed the Makey Makey to control the experience through the control panel. To guide students in assigning the correct letters on their keyboards, they were given this set of key assignments:
Step #4: Designing the Control Panel
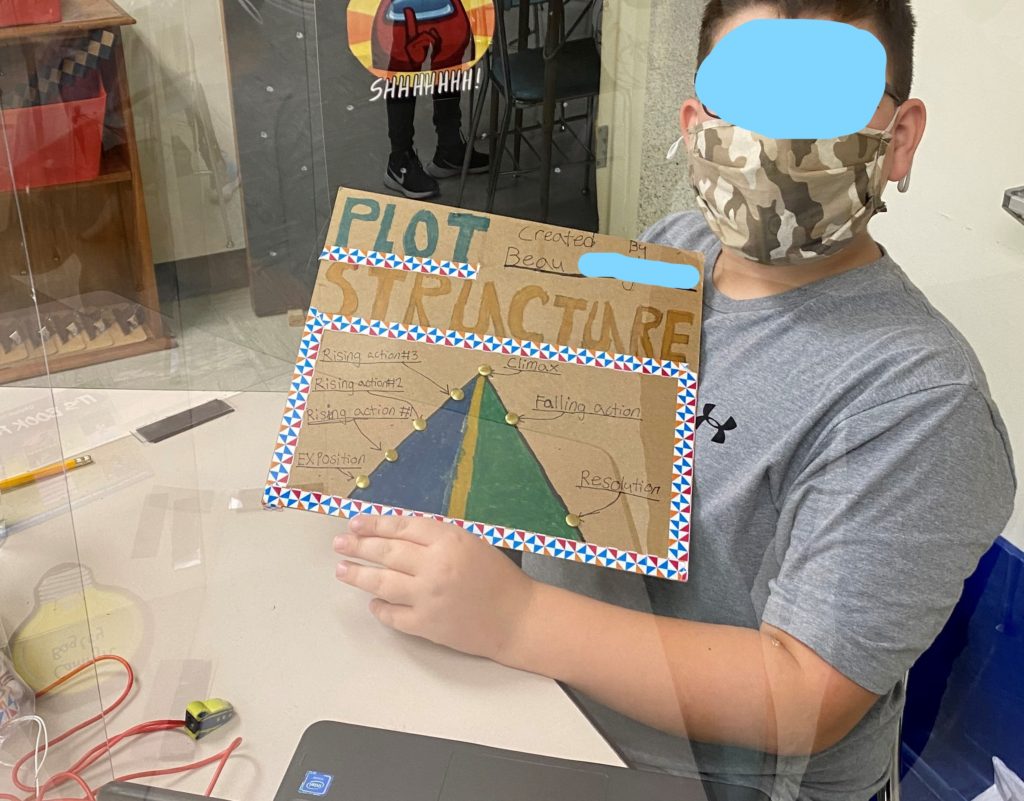
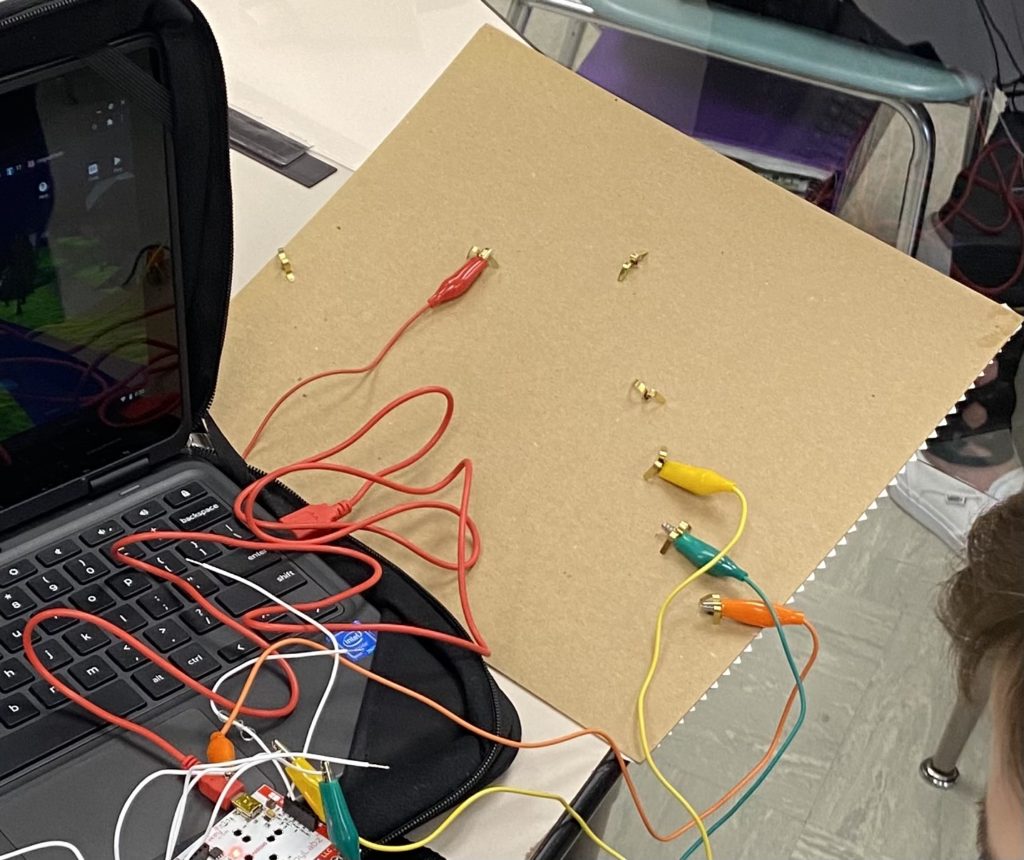
The control panel was basically a piece of cardboard. On it, students were asked to label their project “Plot Structure” and then add the title and author of their book, draw a plot curve and label the 7 elements of plot: (Exposition, Rising Action #1, Rising Action #2, Rising Action #3, Falling Action and Climax) Next to each label, they needed to poke a hole and add a brass fastener. Students were encouraged to embellish/decorate the control panel as they saw fit.
Step #5: Connecting the Makey Makey (and doing a LOT of testing!)
The Makey Makey was essentially the driver of the project. On the back of the control panel, students attached test leads. Each test lead was then connected to a wire on the Makey Makey. Looking closely at the Makey Makey you can see the letters WASDFG. If the student coded the W to be the exposition, the wire went from the W in the Makey Makey to the brass fastener next to the Exposition on the back of the control panel. That way, when the Exposition button was touched, the Exposition panel would ‘pop up’ on the computer screen due to the code they added in CospacesEDU that states: When “w” key is pressed, show info panel…..
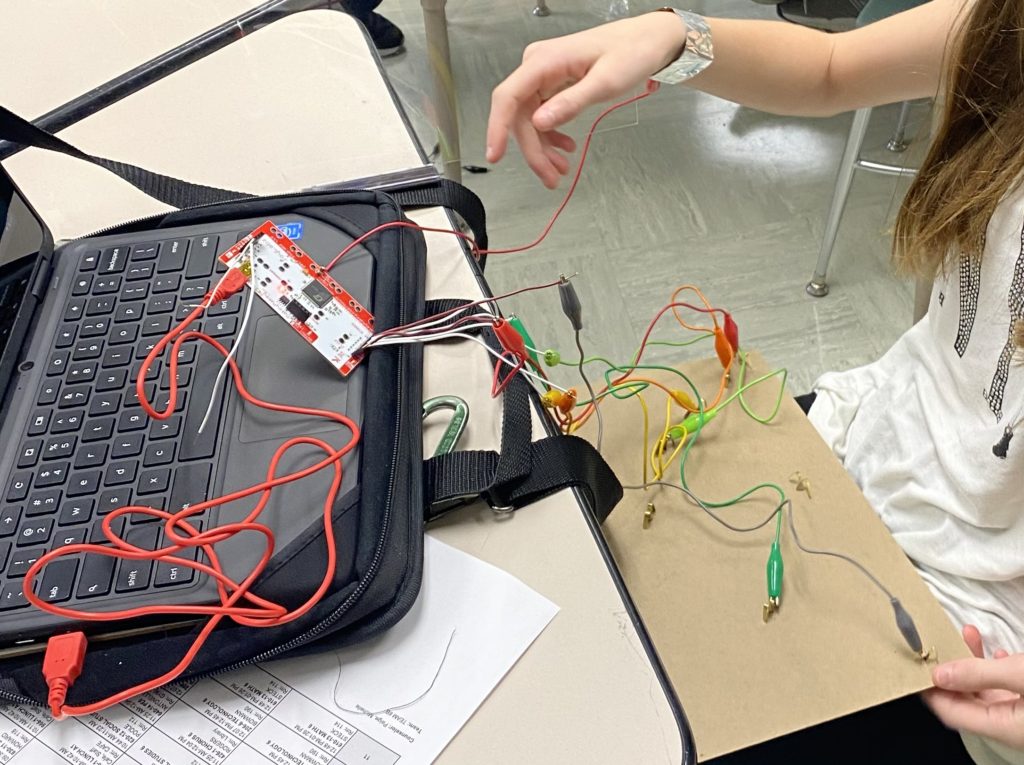
When the projects were finished, students kept connected to their test leads and conducted a gallery walk around the room visiting their peers projects and providing them with constructive feedback.
The students were thrilled to have the opportunity to do something ‘hands on’ They were definitely uninspired with the digital worksheets/notebooks/video instruction they had been immersed in for the past few week. I was just glad we were
FREE ✨Smarticles!✨
Connect with ✨Your Smarticles✨ to get our latest content by email.