
If you haven’t heard the news, NASA landed a Rover called the Perseverance on Mars on February 18, 2021. This is indeed exciting and I, along with millions of other people, held my breath as NASA shared live footage of the landing. Along with the landing, came images of the Perseverance parachuting to the surface of Mars, and as the striking image of the red (orange) and white parachute came into view, news that there was a hidden message within the parachute was revealed.
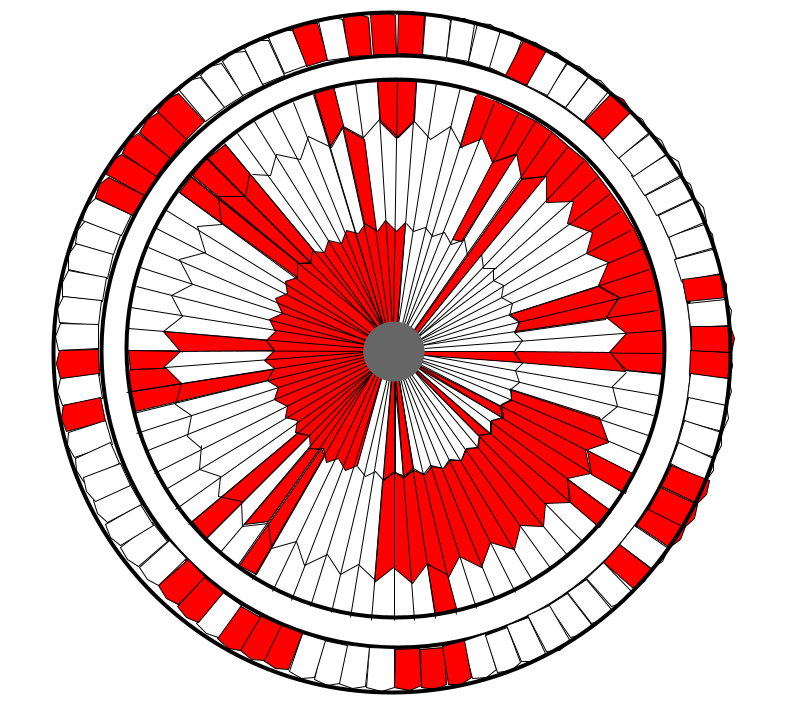
The general design of the parachute looks something like this:
Within 16 hours, the internet figured out the solution to this parachute puzzle. Hidden within this chute are binary digits….the mysterious 0s and 1s that make computer processors work. The digits are organized in a way that reveal a hidden message, that message being: DARE MIGHTY THINGS. The outer ring of the chute is a latitude/longitude designation (34°11’58” N 118°10’31” W) for NASA’s Jet Propulsion Lab in Pasadena, CA. Knowing these messages were ‘in there’ I was determined to figure out how and where.
The FIRST person to devise a reasonable explanation of a solution was on Twitter. Here is the solution image that was shared:
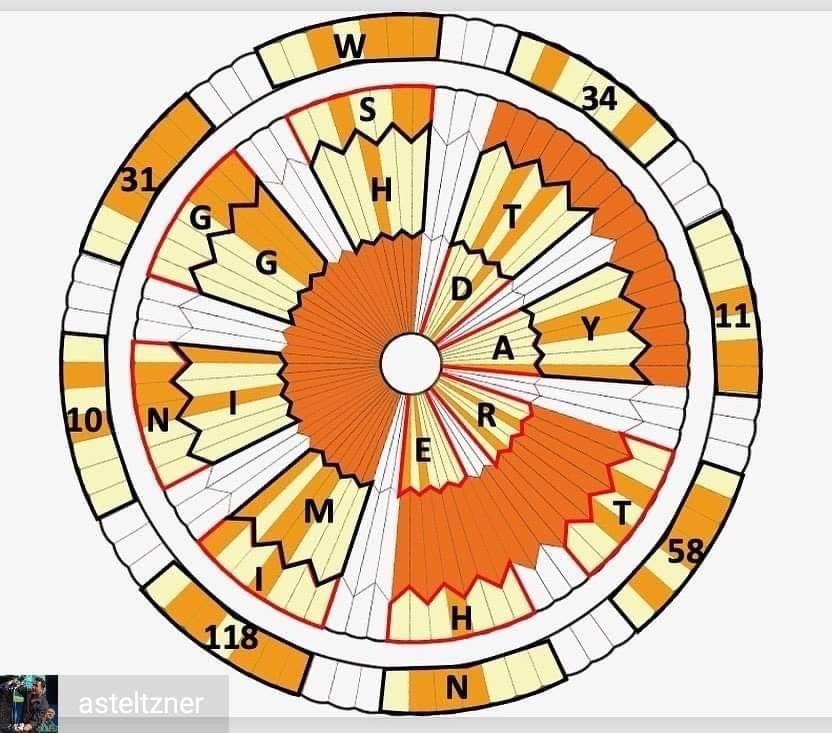
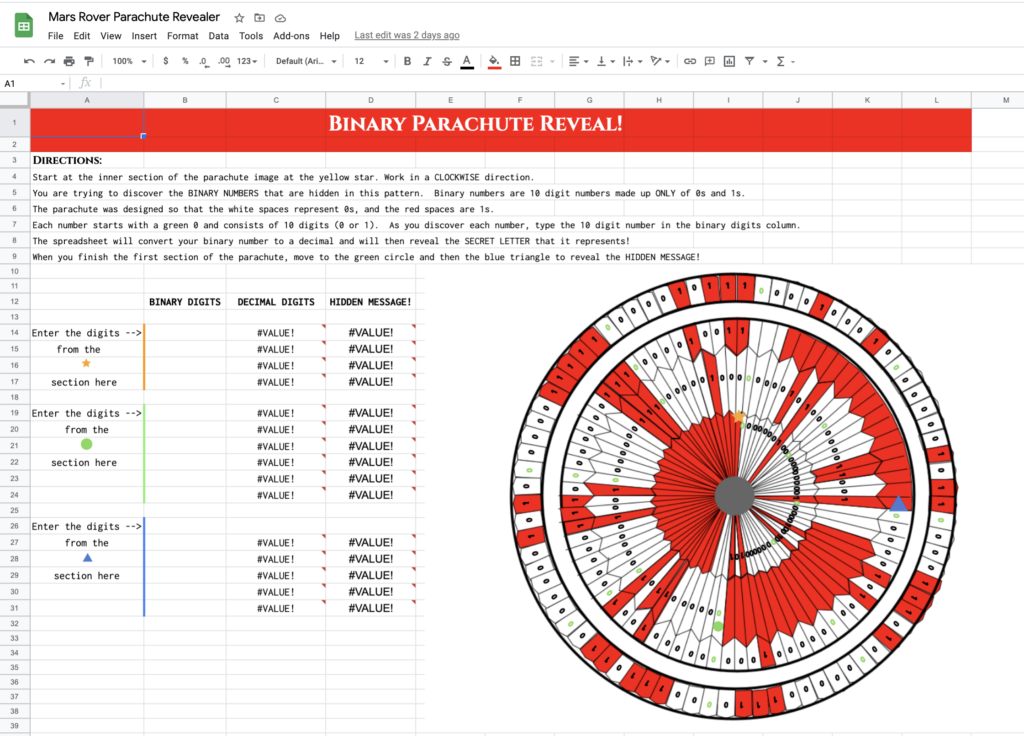
while helpful, it wasn’t enough for me to truly ‘get it’. I needed to see and understand why a letter WAS a letter, so off I went designing my own. After many hours, I developed this solution ‘wheel’.
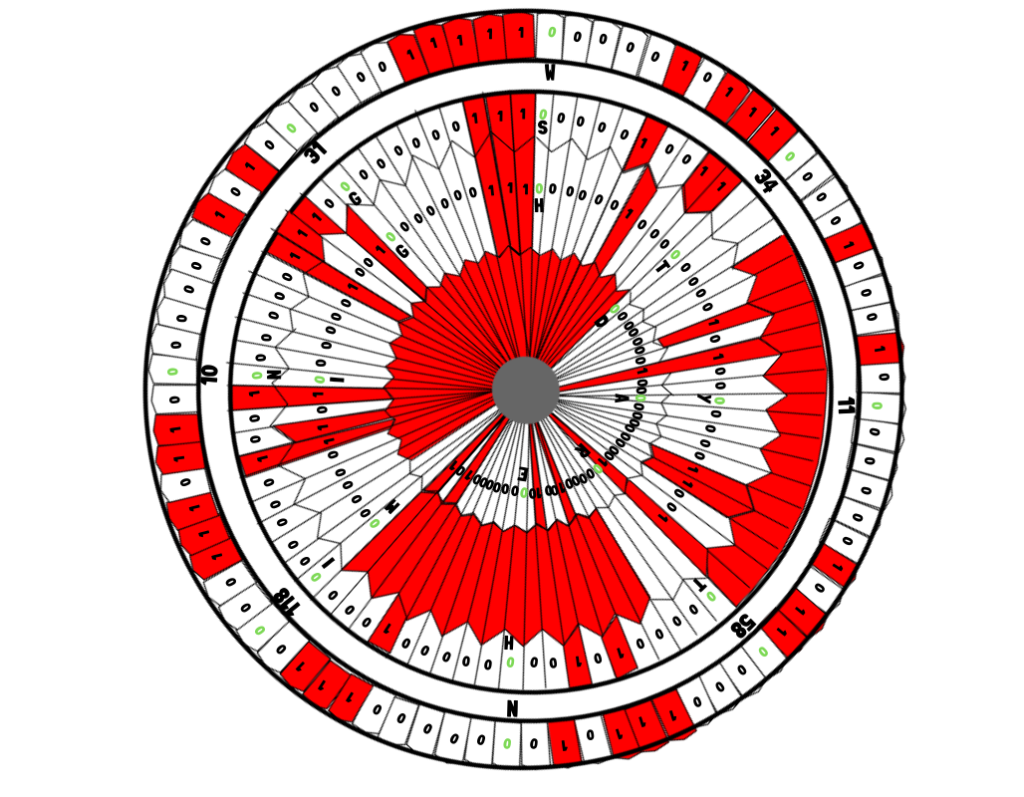
by adding the binary digits DIRECTLY to the wheel I was able to figure out the lighter sections represented 0s and red sections represent 1s. I also noted where each letter starts by placing green 0s in those spots. Finally, to determine the corresponding letter for the binary code, I realized it was a good ole substitution (Caesar) cipher <more on these ciphers later in this post>. If a binary digit was converted to a decimal, it returned a number. I used a spreadsheet with the BIN2DEC formula to convert the binary numbers into decimals. The decimal number corresponded to the position that a letter has in the alphabet. A=1, B=2, etc. and with this technique, I was able to truly see the solution….and best of all, to share it with my students by guiding them through the solution with a solution solver spreadsheet! Get a copy of the spreadsheet solver here
With all this perseverance over the Perseverance puzzle, I became inspired to share some of my FAVORITE cipher strategies that I’ve used in Escape Rooms, Breakouts and Scavenger Hunts over the years.
Six Ciphers for Your Students
Creating codes and ciphers for students to use can be a GREAT tool to engage students in learning. Incorporated into Escape Rooms, Breakouts or even Scavenger Hunts, adding an intriguing puzzle lends to that element of mystique or surprise that is often enough to inspire students to dig in and try just a little bit harder.
Below are some FUN Ciphers to try with your students.
The Polybius Square
A polybius square is basically a grid (usually 25 x 25) that is filled with individual letters of the alphabet. The X axis has numbers and the Y axis has numbers. To provide a clue a letter, you identify the two intersecting numbers that represent the secret letter on the grid.
Substitution (Caesar) Cipher
The most common version of a substitution cipher is using a number to represent the position of each letter in the alphabet, such as that used on the Mars Rover Parachute: A=1, B=2, C=3. This can be made in MANY different ways and can be created by replacing letters with symbols or letters with letters.

Cardano Grille
I always think of this as the peek-a-boo technique. After identifying text, a page in a book, a letter or even a grid of text, the Cardano Grille is an overlay that has holes in it. The holes reveal the hidden message or word that is contained within the entire page. It can be a physical item or a digital item like the one below. This is a set of Boom Learning Cards customized to create a digital escape.
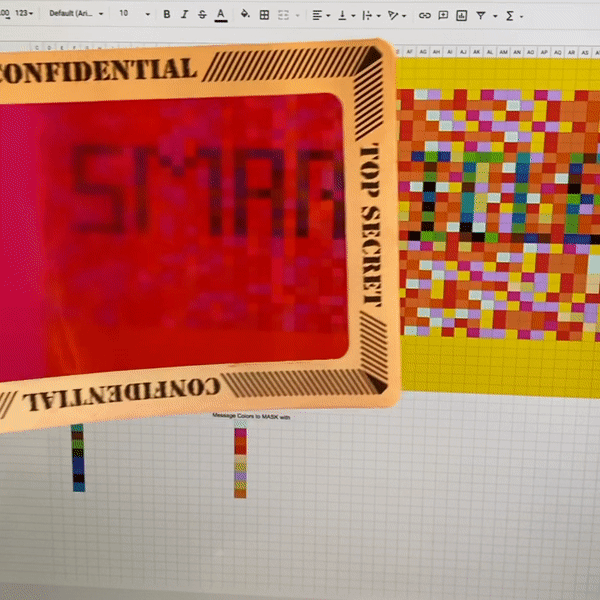
Red Lens Reveal
With a little experimentation, you can create red lens “reveal” activities for students. While these work best with printed images, you can still create a digital red lens “reveal” where students hold either a translucent red cellophane lens over the computer monitor, or even use a digital red lens to reveal hidden messages in content. Here’s a pixel red lens example:
Pigpen Cipher
The Pigpen captured my attention as an incredibly creative way to hide a word that encourages students to use creative symbols to decode that word, and once they learn the cipher strategy, it’s a GREAT way to encourage them to write their own. The Pigpen Cipher is developed by understanding how to interpret these pictoral representations:
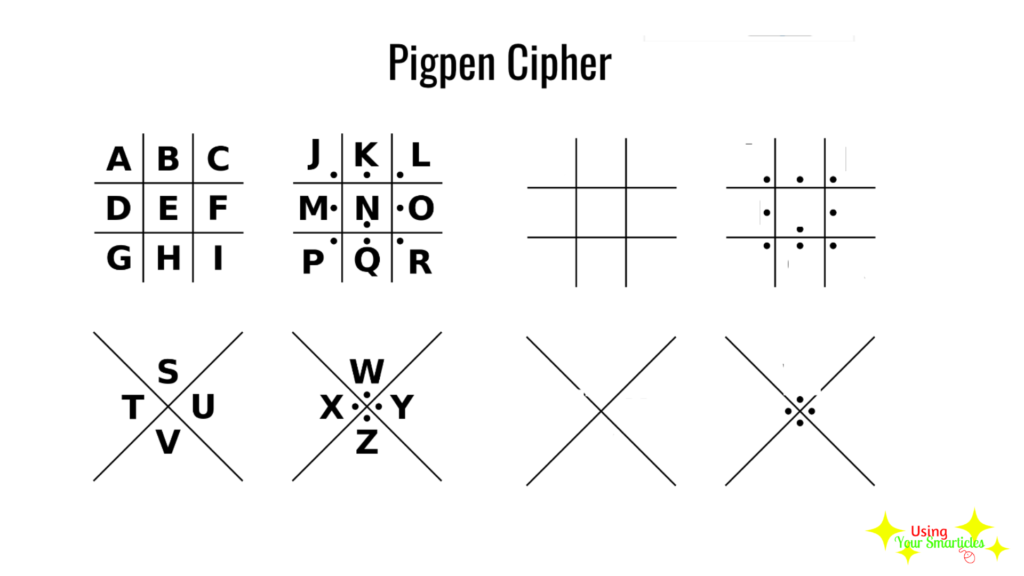
To identify a letter, students are given a mystery symbol like this: ? and they use the grid to figure out the letter. In this case, the box is E because in the upper right hand corner of the cipher image above, the E is surrounded by a box. To create your own Pigpen Ciphers, here’s a tutorial:
Scytale Cipher
This last cipher strategy is completely ‘hands on’ but it’s such a fun way to engage students in an escape or breakout room! The idea is to have a strip of cloth or paper ( I used cash register tape) that fits around a stick or cylinder (I used a paper towel roll) in a certain way. When wrapped around, the symbols/number/letters will line up in a certain way to reveal a hidden message that simply isn’t visible when looking at the strip alone.
I hope something here inspires you to try some ciphers with your students!
Thanks for ✨Using Your Smarticles✨
FREE ✨Smarticles!✨
Connect with ✨Your Smarticles✨ to get our latest content by email.